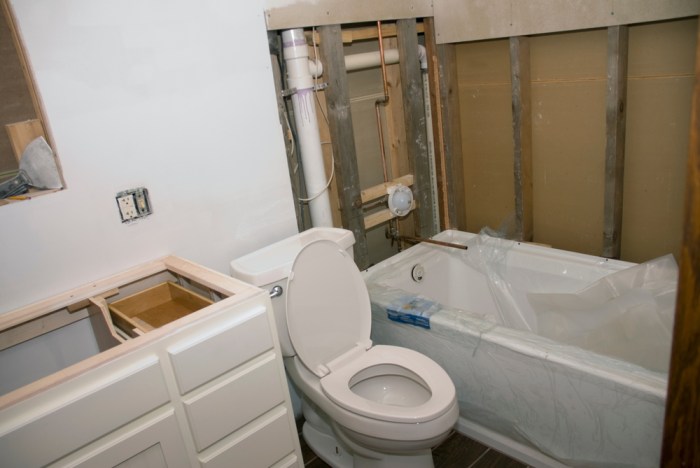
Transforming your bathroom into a spa-like oasis or a functional haven doesn’t require a hefty budget or professional contractors. This guide delves into the rewarding world of DIY bathroom remodel projects, offering practical advice and step-by-step instructions for various upgrades, from budget-friendly fixes to more ambitious renovations. Whether you’re a seasoned DIY enthusiast or a novice tackling your first home improvement project, we’ll equip you with the knowledge and confidence to create a bathroom you’ll love.
We’ll cover a range of projects, from simple painting and refinishing techniques to more involved plumbing upgrades and creative storage solutions. Learn how to maximize your space, enhance your bathroom’s aesthetic appeal, and even coordinate your remodel with a bedroom upgrade for a cohesive home design. We’ll also address common concerns and offer tips for staying within budget while achieving stunning results.
Budget-Friendly DIY Bathroom Remodels

Transforming your bathroom doesn’t require a fortune. With a little creativity and elbow grease, you can achieve a stunning update without breaking the bank. This section Artikels several affordable DIY projects to revitalize your bathroom space.
Five DIY Bathroom Remodels Under $500
These projects offer significant visual impact for minimal investment. Remember to always prioritize safety and follow manufacturer instructions for all materials.
- Repaint the Walls and Trim: A fresh coat of paint instantly brightens a bathroom. Choose a light and airy color to maximize the feeling of space. Materials: Paint (approximately $30-$50), rollers, brushes, painter’s tape. Steps: Prepare the surfaces by cleaning and lightly sanding. Apply primer if necessary.
Apply two coats of paint, allowing sufficient drying time between coats. Carefully paint the trim for a crisp, clean finish.
- Update Cabinet Hardware: Replacing outdated knobs and pulls can dramatically change the look of your bathroom vanity. Materials: New cabinet knobs and pulls (approximately $20-$50). Steps: Carefully remove the old hardware. Measure the new hardware to ensure proper fit. Attach the new hardware using the provided screws.
- Install a New Shower Curtain and Liner: A new shower curtain can add a pop of color or pattern to your bathroom. Materials: Shower curtain and liner (approximately $20-$40). Steps: Remove the old shower curtain and liner. Hang the new shower curtain and liner, ensuring proper placement.
- Add New Lighting Fixtures: Updating light fixtures can improve both the aesthetics and functionality of your bathroom. Materials: New light fixture (approximately $30-$80). Steps: Turn off the power at the breaker box. Carefully remove the old fixture. Install the new fixture, following the manufacturer’s instructions.
Turn the power back on and test the fixture.
- Replace the Toilet Seat: A worn-out toilet seat can detract from the overall appearance of your bathroom. Materials: New toilet seat (approximately $15-$30). Steps: Remove the old toilet seat. Install the new toilet seat, following the manufacturer’s instructions.
Cost-Effectiveness of DIY Bathroom Flooring Options
Choosing the right flooring significantly impacts both the budget and the final look. This table compares three popular options. Prices are estimates and can vary based on quality and retailer.
| Flooring Type | Average Cost per Square Foot | Installation Difficulty | Durability |
|---|---|---|---|
| Tile | $3-$10 | Medium-High (requires skill and time) | High |
| Vinyl | $1-$5 | Low (relatively easy to install) | Medium |
| Laminate | $2-$7 | Low-Medium (easier than tile, more complex than vinyl) | Medium-High |
Repurposing Existing Bathroom Fixtures and Materials
Creativity can extend the lifespan of existing materials and save money. Here are some ideas:
- Repurpose Old Jars as Organizers: Clean and decorate old jars to store cotton balls, Q-tips, or other bathroom essentials. A simple coat of paint or decoupage can transform them into stylish organizers.
- Turn Old Towels into Rags: Cut up old, worn-out towels to create reusable cleaning rags. This is a simple and eco-friendly way to repurpose materials.
- Use Old Frames for Wall Decor: Repurpose old picture frames to create unique wall art. Paint them, add decorative elements, or use them to display small bathroom accessories.
Painting and Refinishing Techniques
Transforming your bathroom with a fresh coat of paint and a refinished vanity can significantly enhance its aesthetic appeal and overall value. Careful selection of materials and techniques ensures a durable and long-lasting result, maximizing your DIY investment. This section details the best practices for painting and refinishing your bathroom fixtures.
Bathroom Wall and Ceiling Painting Techniques
Proper preparation is key to a successful paint job. Begin by thoroughly cleaning the walls and ceilings to remove dirt, mildew, and any loose paint. Use a quality primer designed for bathrooms, specifically formulated to prevent mold and mildew growth. This is crucial in high-humidity environments. After the primer dries completely, apply two coats of high-quality, semi-gloss or satin bathroom paint.
Semi-gloss is easier to clean, while satin offers a slightly softer sheen. Consider using a roller with a high-nap cover for a smoother finish on textured walls. For ceilings, a wider roller will expedite the process. Choose colors that are both visually appealing and complement your bathroom’s overall design and lighting. Lighter colors can make a small bathroom feel more spacious.
Bathroom Vanity Refinishing
Refinishing a bathroom vanity is a cost-effective way to update its look. First, thoroughly clean the vanity to remove any dirt or grime. Then, sand the surface to create a smooth, even base for the paint. Use progressively finer grit sandpaper, starting with a coarser grit to remove any imperfections and gradually refining the surface. Apply a high-quality primer specifically designed for wood or melamine (depending on the vanity material) to ensure good adhesion.
After the primer dries, apply at least two coats of high-quality paint, allowing each coat to dry completely before applying the next. Consider using a paint sprayer for a more even finish, especially on intricate details. Once the paint is dry, apply a clear sealant to protect the finish and make it more resistant to moisture and scratches.
Comparison of Bathroom Paint Types
The choice of paint significantly impacts the durability and longevity of your bathroom’s finish. Here’s a comparison of common types:
- Oil-Based Paint: Offers excellent durability and water resistance. It produces a very hard, durable finish, but has a strong odor and requires mineral spirits for cleanup. It’s also more time-consuming to apply due to longer drying times.
- Latex Paint: A more popular choice due to its low odor, easy cleanup with soap and water, and relatively quick drying time. Latex paints are also available in various sheens, offering flexibility in the final look. While less durable than oil-based paint, high-quality latex paints designed for bathrooms offer good water resistance.
- Epoxy Paint: This is a highly durable and chemically resistant option, ideal for areas with high moisture and potential chemical exposure. However, epoxy paints are more expensive and require specialized application techniques. They are often used in commercial settings or for highly demanding applications.
Storage and Organization Solutions
Effective storage and organization are crucial for a functional and aesthetically pleasing bathroom, regardless of its size. Clever storage solutions not only keep toiletries and other items tidy but also contribute to a more relaxing and spa-like atmosphere. This section explores practical DIY approaches to maximize your bathroom’s storage capacity.
DIY Bathroom Storage Solutions
Three distinct DIY storage solutions, utilizing readily available and affordable materials, can significantly improve bathroom organization.
Solution 1: Repurposed Ladder Shelf: An old wooden ladder, after thorough cleaning and sanding, can be transformed into a charming and functional leaning shelf. Imagine a rustic, painted white ladder leaning against a wall, its rungs acting as shelves to hold rolled towels, baskets of toiletries, and decorative items. The visual appeal of this repurposed item adds character to the bathroom, while the open design prevents the space from feeling cramped.
Solution 2: Mason Jar Organizer: A collection of mason jars, in varying sizes, can be attached to a piece of wood or a repurposed window frame. The jars, painted in coordinating colors or left in their natural glass form, can hold cotton balls, Q-tips, makeup brushes, or other small items. This creates a visually appealing and highly functional storage solution, adding a touch of rustic charm.
Consider adding labels to each jar for easy identification.
Solution 3: Floating Shelves from Reclaimed Wood: Pieces of reclaimed wood, cut and sanded to size, can be mounted to the wall to create floating shelves. These shelves, stained or painted to complement the bathroom’s décor, can accommodate towels, decorative items, and even small plants. The floating design maximizes floor space and creates a visually appealing display.
Space-Saving Tips for Small Bathrooms
Optimizing space in a small bathroom requires strategic planning. The following tips are designed to maximize the functionality of even the smallest bathroom spaces.
Before listing these essential space-saving tips, it is important to remember that even small changes can make a significant difference in a cramped bathroom. Consider these tips as building blocks towards a more organized and efficient space.
- Utilize vertical space with wall-mounted shelves and cabinets.
- Install a corner shelf to take advantage of often-unused space.
- Choose compact, multi-functional furniture, such as a vanity with built-in storage.
- Replace bulky items with slimmer alternatives, such as a space-saving toilet brush holder.
- Declutter regularly to prevent accumulation of unnecessary items.
Maximizing Vertical Space in a Bathroom
Vertical space is often underutilized in bathrooms. By strategically incorporating DIY shelves or organizers, this unused area can be transformed into valuable storage. One effective method involves building simple floating shelves.
To create floating shelves, measure the desired shelf length and depth. Cut planks of wood (e.g., pine or reclaimed wood) to the measured dimensions. Sand the edges smooth and apply a sealant or paint to protect the wood and enhance its appearance. Next, attach sturdy L-brackets to the back of each shelf. Mark the wall where the shelves will be mounted and use a level to ensure they are straight.
Drill pilot holes into the wall and secure the L-brackets using appropriate screws. Finally, carefully position the shelves onto the L-brackets. These shelves can be used to hold towels, toiletries, decorative items, and more, significantly increasing storage capacity without sacrificing floor space.
Bathroom Remodel & Bedroom Upgrade Synergy
Renovating a bathroom and upgrading a bedroom simultaneously presents a unique opportunity to create a cohesive and aesthetically pleasing home environment. By carefully considering design elements and their functional connections, homeowners can achieve a unified look and feel that enhances the overall comfort and value of their living space. A well-planned approach to these projects can minimize disruption and maximize the impact of the improvements.The aesthetic and functional connections between a bathroom remodel and a bedroom upgrade are numerous.
Both spaces are typically considered private retreats, and a consistent design approach can create a sense of calm and continuity throughout this area of the home. Functional connections can involve the use of similar materials or design features that visually link the spaces, creating a sense of flow and harmony. For instance, consistent flooring choices can subtly guide the eye from one room to the next, while similar lighting schemes create a welcoming atmosphere in both rooms.
Design Elements for Cohesive Bathroom and Bedroom Upgrades
A successful synergy between bathroom and bedroom renovations relies on strategically chosen design elements. Applying consistent design choices across both spaces creates a seamless transition and an enhanced sense of unity. Three key elements that can be effectively applied across both rooms are color palettes, flooring types, and lighting styles. Careful consideration of these elements can transform separate spaces into a cohesive and aesthetically pleasing whole.
Color Palette Consistency
Maintaining a consistent color palette is crucial for achieving a unified look and feel between the bathroom and bedroom. This doesn’t necessarily mean using identical colors, but rather selecting a complementary color scheme that uses similar shades and tones. For example, a calming neutral palette featuring soft grays, whites, and beige in the bathroom could be complemented by warmer, slightly more saturated versions of these shades in the bedroom.
Adding accent colors, such as a muted teal or a warm terracotta, in both rooms as smaller design elements can further unify the spaces. This approach creates a sense of visual harmony without being monotonous.
Matching Flooring Types
Using the same or similar flooring materials in both the bathroom and bedroom can visually connect the two spaces. While the bathroom may require water-resistant materials like porcelain tile or waterproof vinyl, the bedroom might feature a similar style of wood-look tile or laminate flooring to create a consistent aesthetic. Consider the texture and pattern as well. A consistent pattern, such as a subtle linear design or a lightly textured surface, could be mirrored in both rooms, creating visual flow and a unified feel.
This consistency in flooring creates a subtle but effective visual connection between the two spaces.
Harmonizing Lighting Styles
The lighting style in both the bathroom and bedroom significantly impacts the overall ambiance. Choosing a similar lighting style can create a sense of continuity and enhance the overall mood of both spaces. For instance, incorporating natural light whenever possible in both rooms, supplemented by warm-toned LED lighting fixtures, can create a relaxing and inviting atmosphere. The use of similar fixture styles, such as sleek, minimalist pendants or recessed lighting, can further strengthen the visual connection.
Consistent lighting helps establish a calming and unified feel across both rooms, enhancing the sense of harmony in the home.
Examples of Cohesive Design Schemes
Imagine a master suite where the bathroom features a calming palette of soft greys and whites, with sleek, modern fixtures and porcelain tile flooring mimicking the look of natural stone. The adjacent bedroom continues this aesthetic with a slightly warmer shade of grey on the walls, complemented by light wood furniture and a similar style of wood-look tile flooring. Warm, recessed lighting with subtle accent lighting creates a relaxing atmosphere in both spaces.
This creates a seamless transition between the rooms, enhancing the overall sense of calm and luxury.Alternatively, a more vibrant design scheme might incorporate a rich teal color as an accent in both the bathroom and bedroom. The bathroom could feature teal patterned tiles as a backsplash, while the bedroom could incorporate teal accents in the bedding or artwork.
Consistent lighting styles, such as brushed nickel fixtures and soft, ambient lighting, could further unify the design. This approach creates a vibrant and energetic feel that flows seamlessly from one space to the other.
Embarking on a DIY bathroom remodel can be a fulfilling and cost-effective way to revitalize your home. By following the practical advice and step-by-step instructions provided in this guide, you can successfully tackle a range of projects, from minor updates to more substantial renovations. Remember to prioritize safety, plan carefully, and enjoy the process of transforming your bathroom into a space that reflects your personal style and enhances your daily routine.
The satisfaction of creating something beautiful and functional with your own hands is truly rewarding.
Common Queries
What permits are needed for DIY bathroom remodels?
Permits vary by location. Check with your local building department to determine necessary permits for plumbing, electrical, or structural changes.
How long does a DIY bathroom remodel typically take?
The duration depends on the project’s scope. Small projects might take a weekend, while larger renovations could extend for several weeks.
What are some common mistakes to avoid during a DIY bathroom remodel?
Common mistakes include inadequate planning, neglecting safety precautions, and underestimating the time and effort required. Thorough planning and preparation are crucial.
Where can I find affordable materials for my DIY bathroom remodel?
Consider discount home improvement stores, online marketplaces, and salvage yards for cost-effective materials.


